Connecting Disks
iSCSI portal - a server that provides access to the storage system via the iSCSI protocol and is identified by name or IP address.
iSCSI target - logical point of connection of the portal. Defined by a unique identifier in the following format:
iqn.<year (4 digits)>-<month (2 digits)>.<domain name in reverse order>: <optional identifier>.
The month and year in the identifier - domain registration date.

!!! example An example of valid identifiers"
    `iqn.2003-01.com.ibm:00.fcd0ab21.shark128`
    `CPV_IQN:ceph-idc`
Multiple iSCSI targets can be configured in the iSCSI portal.
iSCSI client or iSCSI initiator is a client machine, each identified by the unique client ID in the same format as the iscsi target.
Many operating systems generate iSCSI IDs themselves during installation.
For example, CentOs and RedHat generate an identifier in the format iqn.1994-05.com.redhat: fbb1b3344d99, where the last 12 digits are the mac address of the network interface. When configuring the client, you can use the generated identifier, you can create your own. For an iSCSI client to connect to an iSCSI target, it must be registered with the iSCSI target with a list of disks that it can use.
The same client can be simultaneously connected to one or several targets of the same or different portals. The same iSCSI disk can be connected to multiple clients. The client software is responsible for the integrity of the data.
Connecting iSCSI drives on Windows 10
-
Launch the iSCSI initiator program:
Start->search->iSCSI Initiator -
When connecting a disk for the first time, the following dialog will appear:

Click
Yes. -
When the program window opens, select the
Configurationtab, and selectChangeto configure the client ID. In the dialog box that opens, enter the name of the client added to the iSCSI storage UI.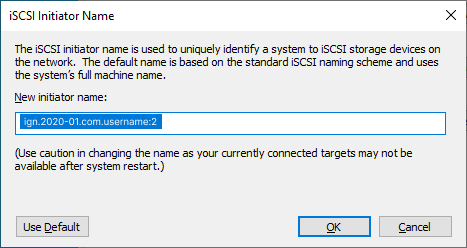
Or you can go the opposite way: first, open the iSCSI Initiator, find out the default machine ID, and then add a client with that name to the UI.
-
Select the
Discoverytab: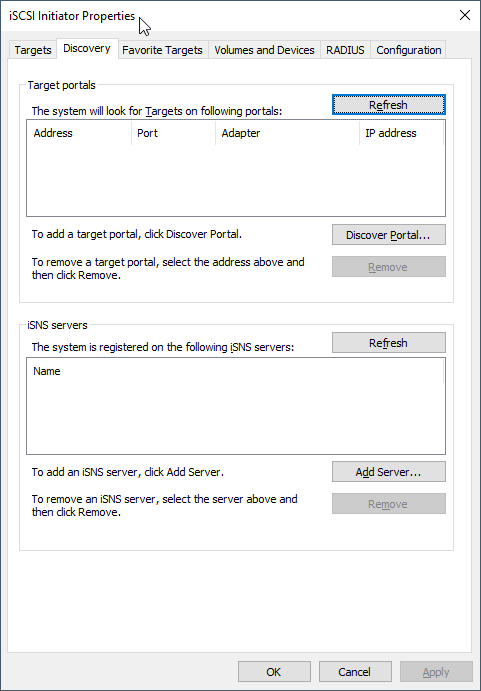
-
Select
Discover portal. -
In the dialog that opens, enter the IP address of any portal from the list displayed in the iSCSI storage UI above the
DiskandClientstabs next to the quotas and clickOK: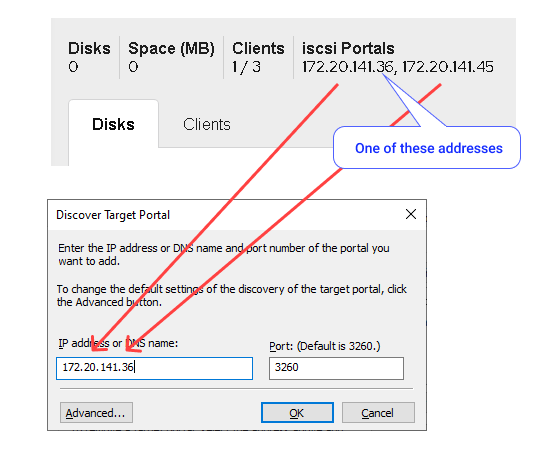
-
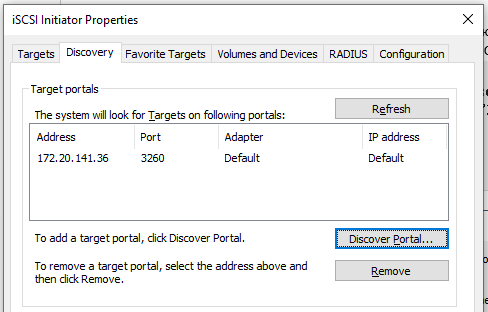
Make sure the portal was added successfully:
-
Go to the
Targetstab, select a single target from the list, and selectConnect: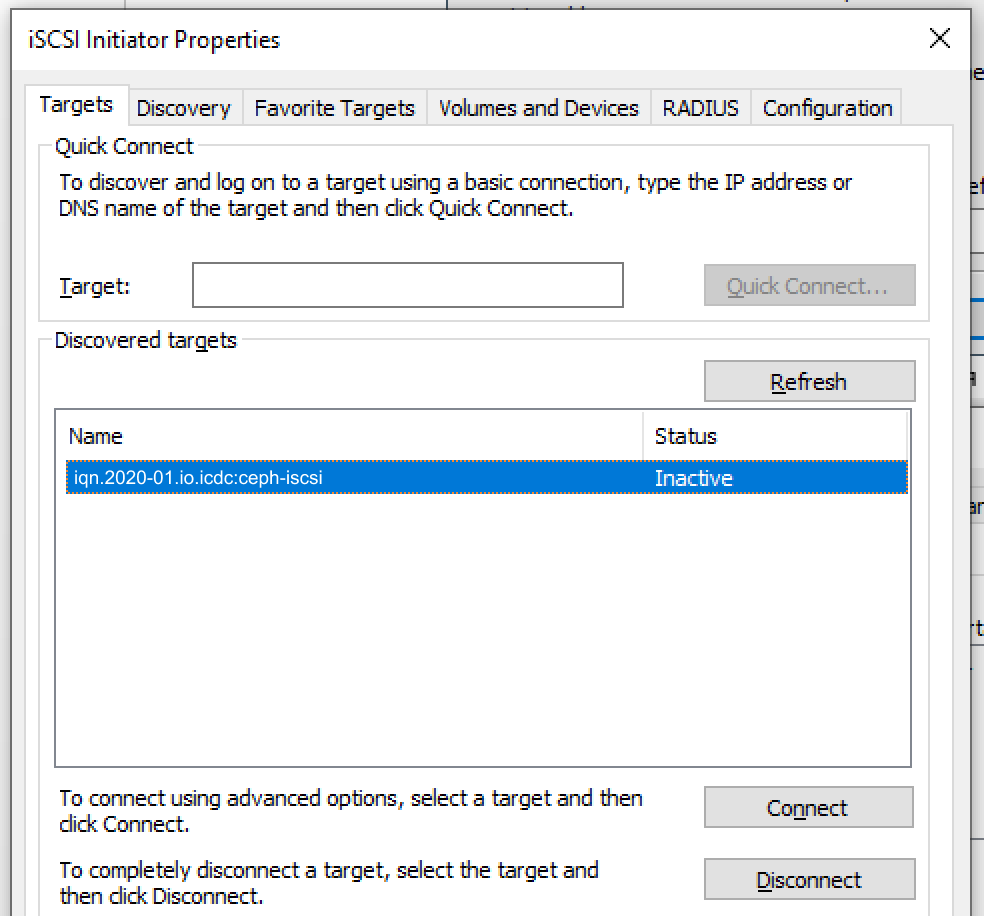
-
In the appeared dialog, select
Advanced: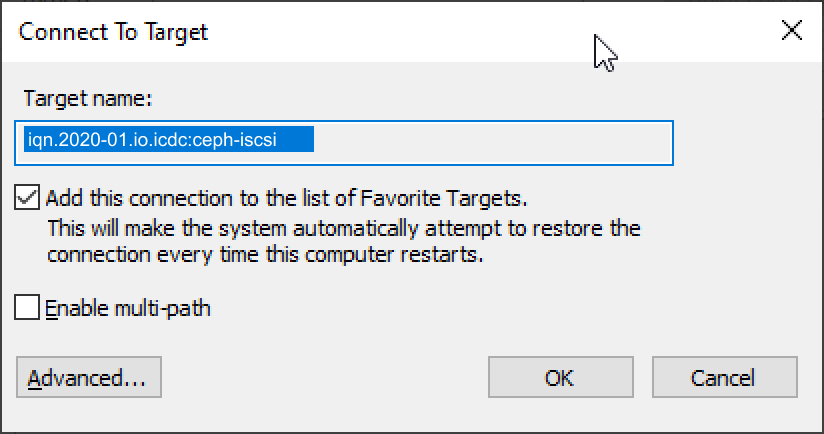
-
In the
Advancedwindow enableEnable CHAP on log on, enter the username and password, clickOKand thenOKin theConnect to Targetwindow: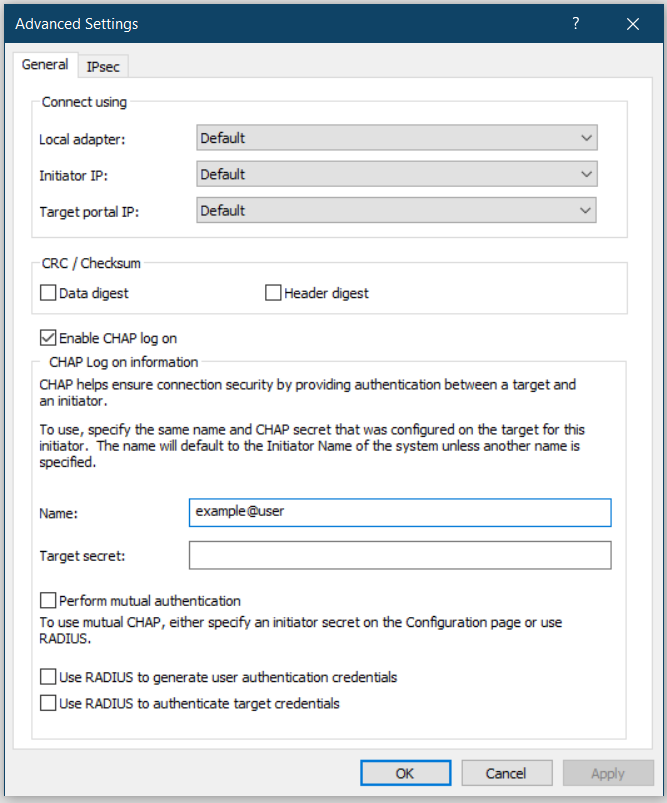
-
Make sure, that the target is in the
Connectedstate: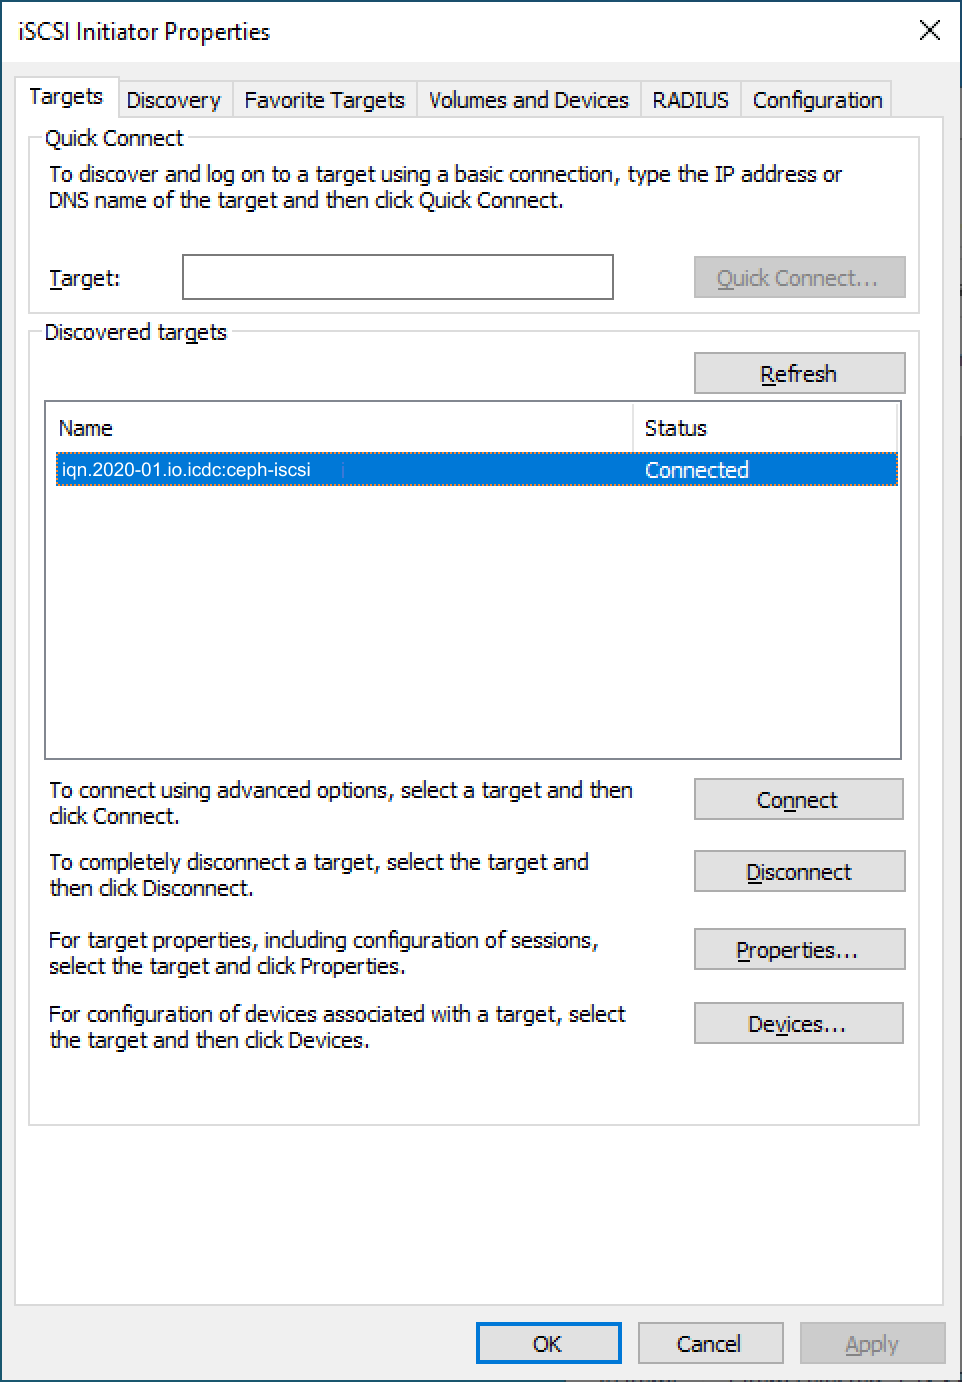
-
You can view the connected drives by selecting
Devices: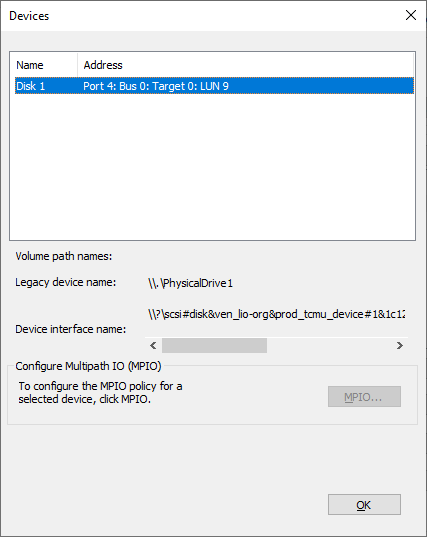
-
Further, you can work with the disk as with another regular hard disk. Go to
Control Panel->Administrative tools->Computer Management->Storage->Disk Management, and initialize the disk, partition, format, etc.
Multi-Path support
Multi-Path technology is the creation of more than one connection between the client and the server for the smooth operation of the service when a problem occurs with one of the connections. If more than one iSCSI portal is configured in the iSCSI Storage service, then the service can operate using multi-path technology, establishing connections to all ports.
Multipath technology can operate in several modes. The only supported mode in iSCSI Storage is the Fail Over mode, in which only one connection works constantly, and the second is enabled only when the first is disabled.
Multi-path connection is possible on the Windows platform starting from Windows-2016 and on the Linux platform.
Connecting iSCSI disks with Multi-Path support on Windows-2016
- Using the ServerManager application, install the
Multipath I/Ocomponent. -
Enable multi-path support for iSCSI devices:
OpenControl Panel->MPIO, then proceed toDiscover Multi-Paths, selectAdd support for iSCSI devices, pressAdd, and restart the system.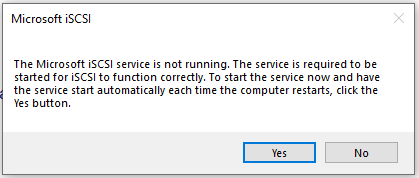
-
After restarting, set the
Fail Overmode for all connected devices.
Then openCommand Promptand run commandmpclaim -l -m 1.
Make sure that the Fail Over mode is activated using the commandmpclaim-s -m: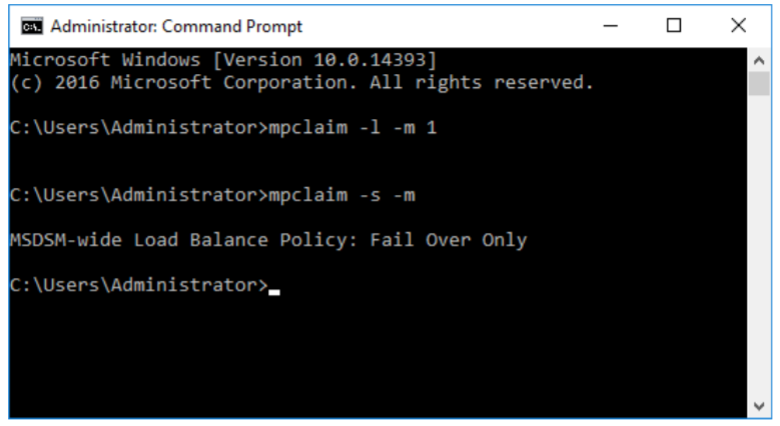
-
Follow the instructions for connecting ISCSI disks on Windows 10, except in the
Connect to Targetdialog, before clickingOK, check toEnable multi-path: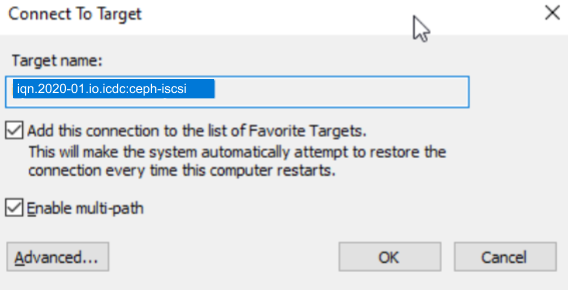
Connecting iSCSI disks on Linux (CentOS 7)
iSCSI client is configured with multipath support, for failover in case one of the iSCSI servers crashes.
-
Install packages:
-
Next:
-
Specify in
/etc/multipath.confthat multipath will be used for iSCSI devices (add the devices section):
devices {
        device {
                vendor                 "LIO-ORG"
                hardware_handler       "1 alua"
                path_grouping_policy   "failover"
                path_selector          "queue-length 0"
                failback               60
                path_checker           tur
                prio                   alua
                prio_args              exclusive_pref_bit
                fast_io_fail_tmo       25
                no_path_retry          queue
        }
}

blacklist {
}

defaults {
}
-
Next:
-
Install client iqn in
/etc/iscsi/initiatorname.iscsi: -
Set in
/etc/iscsci/iscsci.confparametersnode.session.auth.authmethod, node.session.auth.username, node.session.auth.passwordfor CHAP authorization:
# To enable CHAP authentication set node.session.auth.authmethod
# to CHAP. The default is None.
node.session.auth.authmethod = CHAP

# To set a CHAP username and password for initiator
# authentication by the target(s), uncomment the following lines:
node.session.auth.username = asharapov
node.session.auth.password = asharapov123
-
Start a search for targets, specifying the address of any of the configured iSCCSI servers:
-
Connect:
$ iscsiadm -m node -T CPV_IQN.storage:iscsi-gw -l

Logging in to [iface: default, target: CPV_IQN.storage:iscsi-gw, portal: 172.20.141.33,3260] (multiple)
Logging in to [iface: default, target: CPV_IQN.storage:iscsi-gw, portal: 172.20.141.36,3260] (multiple)
Login to [iface: default, target: CPV_IQN.storage:iscsi-gw, portal: 172.20.141.33,3260] successful.
Login to [iface: default, target: CPV_IQN.storage:iscsi-gw, portal: 172.20.141.36,3260] successful.
- Check multipath:
$ multipath -ll

36001405c05ae6fc87834550abf4fb426 dm-6 LIO-ORG ,TCMU device
size=1.0G features='1 queue_if_no_path' hwhandler='1 alua' wp=rw
|-+- policy='queue-length 0' prio=50 status=active
| `- 5:0:0:0 sda 8:0  active ready running
`-+- policy='queue-length 0' prio=10 status=enabled
  `- 4:0:0:0 sdb 8:16 active ready running
-
Work with
/dev/mapper/36001405c05ae6fc87834550abf4fb426as with a regular disk:$ fdisk -l /dev/mapper/36001405c05ae6fc87834550abf4fb426 Disk /dev/mapper/36001405c05ae6fc87834550abf4fb426: 1073 MiB, 1073741824 bytes, 2097152 sectors Units = sectors of 1 * 512 = 512 bytes Sector size (logical/physical): 512 bytes / 512 bytes I/O size (minimum/optimal): 512 bytes / 4194304 bytes $ mkfs -t ext4 /dev/mapper/36001405c05ae6fc87834550abf4fb426 ...
If the file system located on the iSCSI disk will be added to /etc/fstab, then do not forget to specify _netdev in the mount options.
Note
For connecting iSCSI drives to other operating systems, see the official documentation for the respective operating system.
Connecting via VPN and DirectConnect
In some cases (such as data migration) it may be required to connect an iSCSI block device to the host placed outside account's VPC. Connection options are VPN Gateway or DirectConnect.
Note
This should be considered only as a temporary setup as such connections can have poor performance because of network delays. Also this configuration can be disabled in a specific VPC. If the following configuration did not.
If host is connected via VPN Gateway then make sure that one of the routing options to iSCSI Gateway is configured:
- Direct routing
- NAT mapping
Direct routing to iSCSI Gateway
Add VPC's special VirtualService subnet (198.18.0.0/26 by default) into Wireguard client config to list of allowed IP subnets:
```
AllowedIPs = ..., 198.18.0.0/26
```
Reconnect VPN and try accessing iSCSI Gateway by direct IP from the host:
```bash
$ nc -v 198.18.0.2 3260

Connection to 198.18.0.2 3260 port [tcp/*] succeeded!
```
NAT mapping to iSCSI Gateway
- Configure a NAT subnet that does not exist on the connecting host or in the account's VPC.
- Add NAT IP record for
iSCSI Gateway(198.18.0.2by default) to theVPN Gateway. -
Use NAT IP (e.g.
10.0.0.2) to validate the connection toiSVSI Gateway: